The Ultimate 3D Printing 101 Guide
By ERMW Team
Thursday, January 15, 2026
3D printing, formally known as Additive Manufacturing, has evolved from a niche sci-fi concept in the 1980s to a household tool capable of printing everything from spare car parts to custom dental aligners. Unlike traditional manufacturing, which is "subtractive" (cutting away material from a block), 3D printing is "additive"—it builds objects layer by layer from the ground up.
This guide covers how it works, the core technologies, materials, and how you can get started.
Part 1: How 3D Printing Works (The Workflow)
Regardless of the specific machine, every 3D print follows the same four-step lifecycle.
1. Design (The Blueprint)
It starts with a digital 3D model. You don't always need to be an artist; you can:
Download: Repositories like Thingiverse or Printables offer millions of free, ready-to-print models.
Design: Use CAD (Computer-Aided Design) software. Beginners often start with Tinkercad (drag-and-drop shapes), while professionals use Fusion 360 or Blender.
Scan: 3D scanners can digitize real-world objects into 3D models.
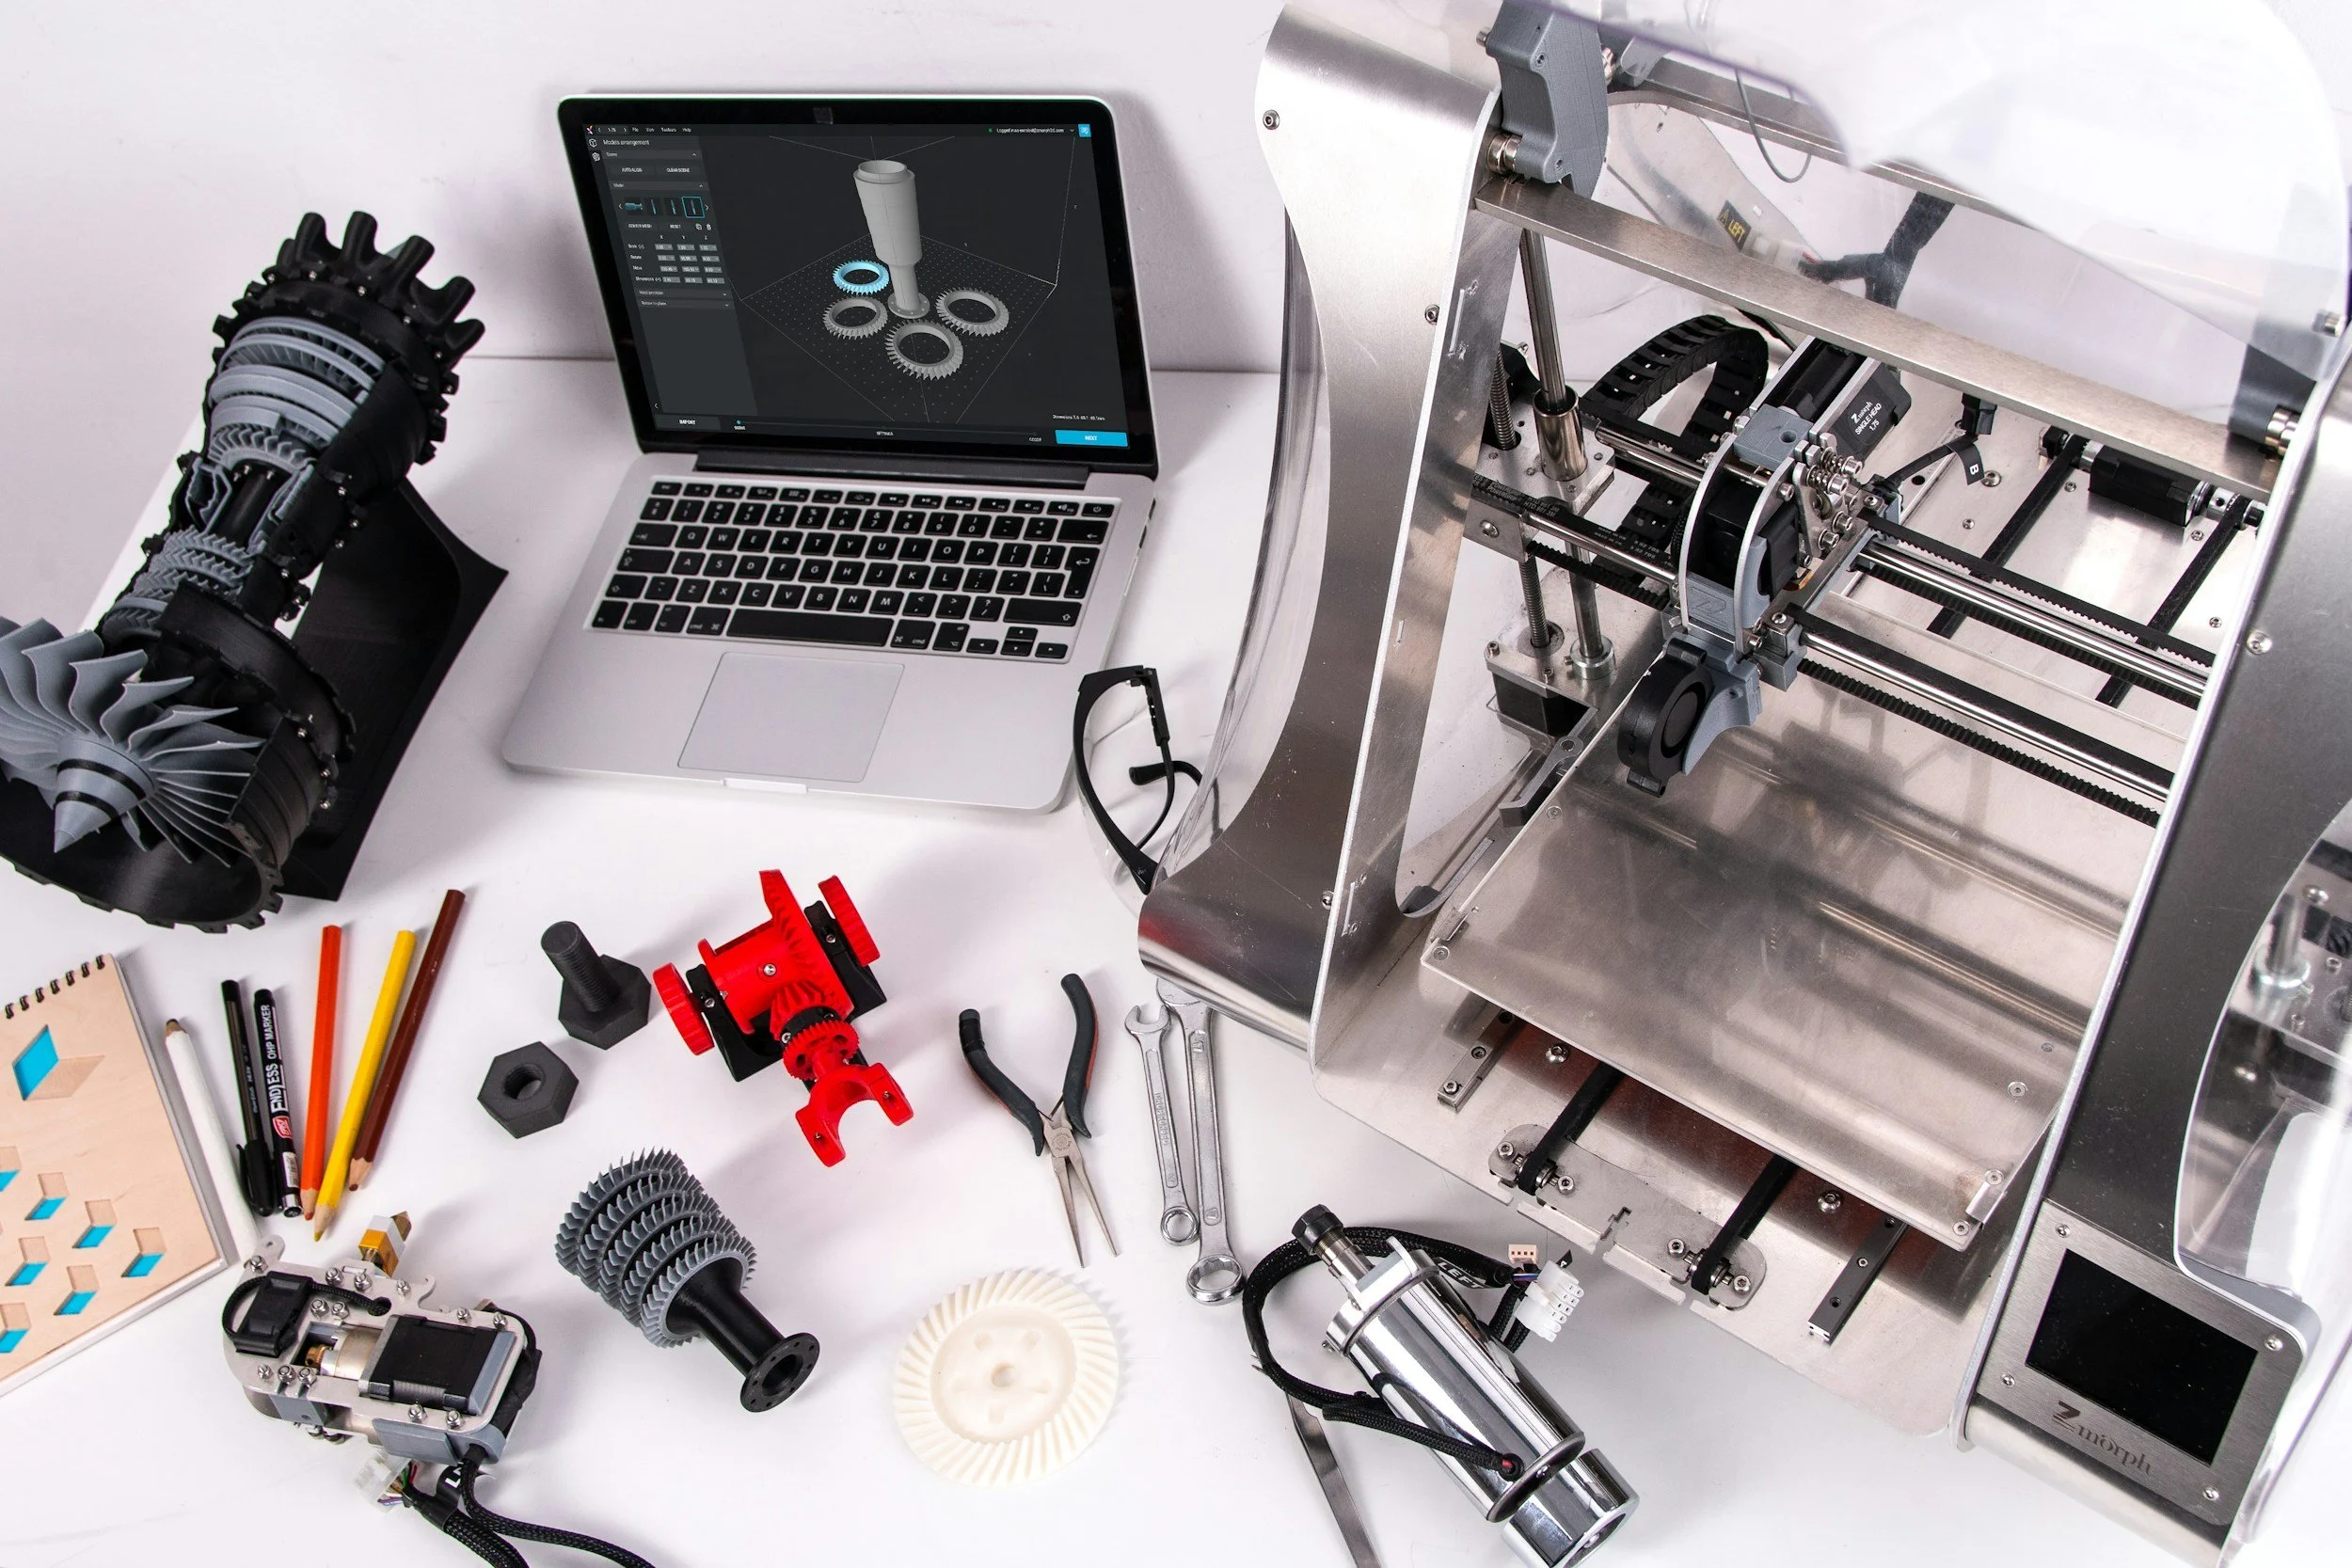
2. Slicing (The Translation)
Printers don't understand 3D models directly. You must use a piece of software called a Slicer (like Cura or PrusaSlicer). The slicer cuts your digital model into thousands of thin horizontal layers and generates G-Code—a long list of coordinate instructions that tells the printer exactly where to move the print head.
3. Printing (The Fabrication)
The printer executes the G-Code instructions. It heats up material (or cures liquid) and deposits it layer by layer. The time required depends on the size and complexity of the object, ranging from 30 minutes to several days.
4. Post-Processing (The Finish)
Fresh off the printer, a part might not be ready.
FDM (Filament): May require removing support structures (scaffolding generated to hold up overhanging parts) and sanding.
SLA (Resin): Requires washing in alcohol to remove sticky residue and "curing" under UV light to fully harden.
Part 2: The Technologies (FDM vs. SLA)
While there are many types of 3D printing, beginners usually choose between two main technologies: FDM and SLA.
1. Fused Deposition Modeling (FDM)
Also known as FFF (Fused Filament Fabrication), this is the most common and affordable type for hobbyists.
How it works: A spool of thermoplastic filament is fed into a heated nozzle (extruder). The nozzle melts the plastic and draws the layer onto a build plate. The plate then lowers (or the nozzle raises), and the next layer is drawn on top.
Best for: Functional parts, large prototypes, cosplay props, and household items.
Pros: Cheap materials, large build volumes, easy to maintain.
Cons: Visible "layer lines" (rough surface), lower resolution than resin.
2. Stereolithography (SLA)
SLA printers use liquid resin instead of solid plastic wire.
How it works: A build platform lowers into a tank of liquid photopolymer resin. A UV laser (or LCD screen) flashes the shape of the layer onto the resin, instantly hardening (curing) it.
Best for: Miniatures (D&D), jewelry patterns, dental models, and highly detailed art.
Pros: Incredible resolution (invisible layer lines), smooth surface finish.
Cons: Messy (liquid resin is toxic/sticky), brittle parts, requires chemical post-processing.
3. Selective Laser Sintering (SLS)
Note: This is an industrial technology but worth knowing.
How it works: A laser fuses powdered material (usually nylon) layer by layer.
Key Advantage: No support structures are needed because the unsintered powder holds the part up. This allows for complex, interlocking geometry that FDM and SLA cannot easily achieve.
Part 3: Materials Guide
Your choice of material defines the strength and look of your print.
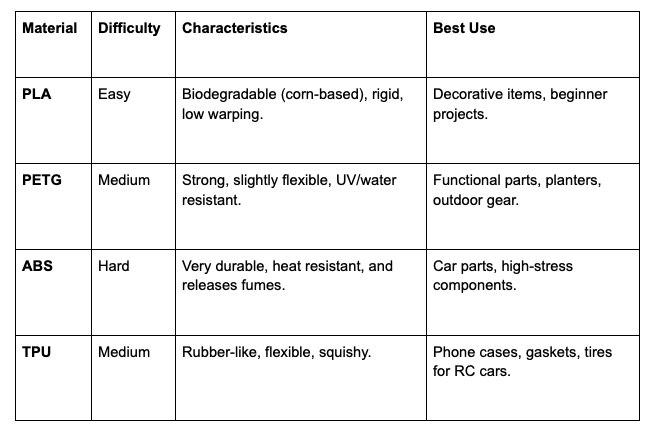
Common FDM Filaments
Common SLA Resins
Standard Resin: Great detail, brittle, distinct "plastic" smell.
ABS-Like/Tough Resin: Less brittle, can withstand drops and impacts better.
Castable Resin: Used by jewelers; burns out cleanly to create molds for metal casting.
Part 4: Essential Software for Beginners
You don't need to spend money to start designing.
Tinkercad (Web-based): The absolute easiest entry point. You build models by grouping primitive shapes (cubes, cylinders) together. Ideal for learning the logic of 3D space.
Ultimaker Cura (Slicer): The industry-standard free slicer for FDM printers. It visualizes how your print will look and estimates print time/cost.
Fusion 360 (Free for hobbyists): A powerful parametric design tool used by engineers. If you want to design a functional part with specific measurements (e.g., a bracket for a shelf), this is the tool to learn.
Part 5: Troubleshooting 101
3D printing is a skill, not just a "push button" process. Here are the three most common hurdles beginners face:
Bed Leveling (The #1 Issue): If the nozzle is too far from the build plate, the plastic acts like spaghetti and won't stick. If it's too close, it scrapes the bed. The "first layer" must be squished slightly to adhere properly.
Adhesion: Prints can detach mid-print. Solutions include using a heated bed, applying glue stick or hairspray to the surface, or adding a "brim" (a flat hat-rim of plastic around the object) in your slicer settings.
Temperature: Printing too hot causes stringing (cobwebs of plastic); printing too cold causes layers to separate (delamination). Always check the manufacturer's recommended range for your filament.
The barrier to entry for 3D printing has never been lower. Whether you want to print a replacement knob for your dishwasher or a custom figurine for your desk, the technology is now accessible to anyone willing to learn the basics of the workflow: Design > Slice > Print.