Field Audio 101
By ERMW Team
Thursday, September 3, 2026
When audiences watch a film, they will forgive a soft focus frame, a slightly missed exposure, or stylized grain. They will not forgive bad audio. Distorted dialogue, oppressive wind noise, or inconsistent room tone immediately breaks the cinematic spell, signaling an amateur production and pulling the viewer out of the story.
In video production, picture gets the glory, but audio does the heavy lifting. Capturing professional, clean field audio is equal parts science, preparation, and creative problem-solving. Whether you are working on a indie narrative short, a local documentary, or a community media project, this guide covers the foundational gear, essential techniques, and field workflows needed to get pristine sound on location.
1. The Core Field Audio Toolkit
To record quality audio outside the controlled environment of a studio, you need a dedicated kit designed for mobility, isolation, and control.
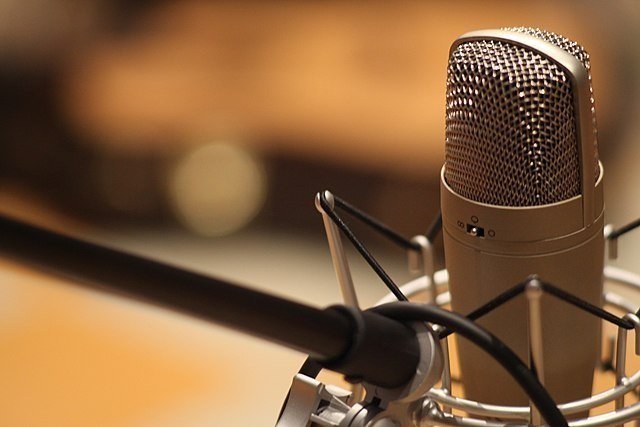
Microphones: Transducers of Choice
Different environments and recording scenarios require different polar patterns (how a microphone picks up sound from various directions):
Shotgun Microphones (Interference Tube): Highly directional, shotgun mics reject sound from the sides and rear while capturing audio directly in front of the capsule. They are the standard choice for booming outdoors or in acoustically treated space. Caution: Indoors—especially in small rooms with hard, reflective walls—a shotgun mic's rear lobes can pick up phase-cancelled bounce, creating a hollow, comb-filtered sound.
Hypercardioid / Supercardioid Condensers: The preferred choice for interior dialogue. They feature a tighter pickup pattern than standard cardioid mics without relying on an interference tube, making them much more forgiving in reflective indoor environments.
Lavalier Microphones (Lavs): Miniature omnidirectional capsules clipped or taped directly to talent. Lavs provide close-proximity voice pickup, making them invaluable in noisy locations or wide visual shots where a boom pole would enter the frame.
Recorders and Preamps
While modern cameras can capture audio, dedicated field recorders (such as Sound Devices, Zoom F-series, or Tascam Portacapture) offer superior ultra-low-noise preamps, dedicated physical controls, dual-card recording for backup, and reliable 32-bit float recording capabilities.
What is 32-Bit Float?
Traditional 24-bit audio requires precise input gain staging; if an actor suddenly screams, the signal clips and distorts permanently. If they whisper, the signal sinks into the floor noise. 32-bit float recording captures such a massive dynamic range that audio cannot clip at the converter level. You can pull clipped waveform peaks down or boost whispers up in post-production without adding digital distortion or preamp hiss.
Essential Accessories
Boom Pole & Shock Mount: A carbon-fiber or aluminum boom pole gets the microphone near the source. A proper shock mount isolates the capsule from handling noise and pole vibrations.
Wind Protection: Foam covers only protect against gentle indoor drafts. For outdoor field work, high-wind protection like a synthetic fur "deadcat" or a full blimp system (a rigid basket enclosing the mic) is non-negotiable.
Closed-Back Monitoring Headphones: Industry-standard headphones (e.g., Sony MDR-7506) isolate your ears from ambient noise, allowing you to hear precisely what the microphone is capturing—including subtle background hums or frequency buzzes.
2. Mic Placement and Booming Mechanics
Great sound isn't bought; it's placed. The physical distance and angle between the microphone capsule and the audio source dictate signal quality more than any piece of expensive outboard gear.
The Art of the Boom
The primary goal of a boom operator is to get the microphone as close to the talent’s mouth as possible without entering the camera's frame line.
Positioning: Aim the mic from above, angled roughly 45 degrees toward the speaker’s mouth (pointing toward the chest/sternum). Placing the mic above the subject points the off-axis side of the capsule downward toward the floor, which helps deaden background noise from horizon sources like traffic or HVAC units.
Distance: Keep the microphone capsule approximately 12 to 18 inches away from the talent’s mouth. Moving from 12 inches to 24 inches doesn't just cut the volume; it shifts the ratio of direct voice to room reverberation, making the talent sound distant and hollow.
Operation Stance: Stand in a stable, comfortable position with feet shoulder-width apart. Hold the boom overhead with arms extended in an "H" shape to minimize fatigue. Rest your hands lightly on the pole—never slide or shift your grip while recording, as friction transmits directly down the pole to the capsule.
Concealing Lavalier Microphones
When shots are too wide for a boom, lavaliers must be rigged beneath clothing:
Placement: Position the lavalier capsule at the center of the talent's chest (sternum level), pointing up toward the mouth.
Managing Clothing Rustle: Friction between fabric and the capsule creates rustle. Use moleskin, dedicated lav-mounts (like Undercovers or Vampire Clips), or medical tape sandwich techniques to isolate the capsule from fabric movement.
Polarity Awareness: Remember that omnidirectional lavs pick up sounds equally in 360 degrees. If talent turns their head completely away from the mic during a line delivery, tone balance can shift.
3. Managing On-Location Acoustics
The physical environment dictates your baseline signal-to-noise ratio, making a thorough acoustic audit essential before hitting record.
In interior spaces, hard boundaries like hardwood floors, glass windows, and bare drywall produce reflective echo and reverb; laying down moving blankets or furniture pads just outside the camera frame helps soften these surfaces and deaden room bounce. Mechanical noises—such as HVAC units, space heaters, and refrigerators—create constant low-frequency hums that muddy dialogue, so turn them off entirely during takes (and drop your car keys inside the fridge as a reminder to switch it back on after wrap).
shooting outdoors, wind movement can easily destabilize a mic's diaphragm, requiring full blimp wind systems with fur covers and strategic body placement to shield the capsule.
Finally, for transient low-frequency rumbles from aircraft or passing traffic, hold takes until the vehicle passes, and notify the director immediately whenever an uncontrollable noise ruins a performance.
4. On-Set Workflow and Best Practices
A smooth field recording workflow requires strict habits, continuous monitoring, and clear communication with the camera department and director.
Step 1: Gain Staging (24-bit Workflows)
If you are recording in standard 24-bit fixed point:
Set your gain so dialogue averages between -20 dB and -12 dB on your meters.
Allow peak excursions (shouts or sudden loud sounds) to hit no higher than -6 dB, leaving safety headroom to avoid digital clipping (0 dB).
Step 2: Continuous Active Monitoring
Never record audio "blind." Always keep your headphones on during every take. Monitor for:
Subtle rustle or physical handling noise.
Transient background interruptions (dog barks, generator kick-ins).
Frequency interference or wireless dropouts on lavalier channels.
Step 3: Slate and Timecode Sync
Syncing audio and video in post-production relies on clear metadata:
Timecode: If using professional gear, lock timecode across the recorder and cameras using dedicated timecode generators (e.g., Tentacle Sync, UltraSync).
Physical Slate: Always use a clapperboard (or a simple hand clap in frame) at the beginning of each take. The visual point of contact creates a spike on the audio waveform, allowing post editors to align track peaks manually if timecode fails.
Step 4: The Golden Rule — Record Room Tone
Before wrapping a setup, demand 60 seconds of silent room tone with the cast and crew standing in their filming positions, dead quiet.
Every physical space has a unique acoustic signature. In post-production, editors cut between different camera angles and takes, creating tiny pauses between lines. Placing room tone underneath dialogue edits covers the silence drop-offs, making cut transitions seamless and providing noise-reduction plugins with a noise print for cleaning tracks.
5. Troubleshooting Common Field Audio Issues
Even on well-planned shoots, problems arise. Quick diagnostics are essential:
Problem: High-frequency buzz or ground hum.
Cause: Audio cables running parallel to AC power cables or cheap power supplies nearby.
Fix: Cross audio cables and power cables at 90-degree angles. Switch the recorder or receivers to battery power to isolate the circuit.
Problem: Wireless signal dropouts or static.
Cause: Frequency congestion or physical obstruction between transmitter and receiver.
Fix: Perform a fresh RF frequency scan on your wireless receivers. Ensure line-of-sight between transmitter and receiver antennas, maintaining proper distance from body tissue.
Problem: Muffled dialogue on lavalier mics.
Cause: Capsule buried under too many thick layers or covered in tape.
Fix: Ensure the mic grid isn't blocked by heavy clothing weave. Use breathable covers like acoustic mesh or un-gummed moleskin.
Field Checklist for Production Day
Before calling "Quiet on set," run through this rapid pre-flight check:
[ ] Fresh batteries installed in field recorder, wireless transmitters, and receivers.
[ ] Storage cards formatted, tested, and showing adequate recording time.
[ ] Wind protection secured over boom and lavalier capsules.
[ ] Headphones plugged in and volume set to a comfortable monitoring level.
[ ] Gain levels checked during rehearsal; peaks bouncing comfortably around -12 dB.
[ ] HVAC units, fans, and noisy appliances turned off in the immediate area.
[ ] 60 seconds of dedicated room tone captured for each location setup.